


These DH1H1 magnets are the most commonly used "known good" tried and tested magnets for PhobGCC. Their magnetization is strong and lasting.
For PhobGCC installation, these magnets should always be glued to the magnet mounts, and the magnet mounts should be glued to the stickbox pegs. The stickbox pegs, in turn, need to be completely cleaned from grease. Q-tips with one side drenched in ethanol or isopropylic alcohol work well for this: first rub the drenched side on the peg to dissolve the grease, then rub the dry side to wipe up the dissolved grease.
I recommend adding a small amount of glue (cyanacrylate-based glue like superglue works best for this application) into the slit that slides onto the peg first. Only use a little bit, ideally apply a small droplet with a toothpick and spread it to the whole surface evenly, then quickly insert the magnet into the slot (long-nose pliers work well for pressing it in all the way) / push the mount onto the stickbox peg.
As the nylon material is suited very well for friction fit, even without using any glue, the mounts are unlikely to come off. It's only in situations such as blunt impact (dropping the controller) that there's a real risk of the mounts falling off the stickbox pegs.
Due to production variation, some magnet mounts (<2%) won't stick to the pegs well immediately. In this case, it's best to keep them pressed to the stickbox pegs for about 20-30 seconds after the super glue was spread along the slit.
When ordering the 10-piece brackets, it's best to cut the individual mounts from the bracket with precise side cutters, such as Knipex 78 61 125. Position them so that the flat side of the side cutter blades sits flush with the surface that the bracket connector stem sits on top of in order to get a clean cut that won't catch on the stickbox.
The shape used is the official design from the PhobGCC guide, which can be found here: https://github.com/PhobGCC/PhobGCC-doc/blob/main/For_Makers/Phob2_Ordering_Guide.md#optional-purchasing-dh1h1-magnet-mounts
The mounts are for PhobGCC 2.0 and not suitable for PhobGCC 1.X.
Material used: 3201 PA-F nylon from JLCPCB, with the exception of the drill-only type, which is nylon printed in Europe.
If you are only ordering PhobGCC mounts, especially when located in the US (where the DH1H1 magnets are easy to source), ordering them from JLCPCB is usually the better choice and it only really makes sense to buy them from me if you are buying other items as well or need them quickly.
Outside of the US, however, DH1H1 magnets are almost impossible to buy, so it's quite convenient to buy both from me together.
The pre-drilled version is intended only for installing the mounts to a stickbox by first pre-drilling holes to the stickbox pegs and then attaching the mount through a PH0 drive screw (included).
For this, a micro drill bit of ~0.5 mm thickness and a grinder tool are required (not included, pictured below). (0.3-0.8 mm should work – so far I've had the best results with 0.5 mm; thinner drill bits tend to break quickly and 0.7-0.8 mm will have the screw fit less tightly in the drilled hole.)
Important: limit the drill depth to 5 mm (from the top of the mount when pressing it to the stickbox peg) to avoid drilling through the rail part into the shaft part.
Drilling holes for the magnet mounts is more of a hassle than using glue, but the attachment is much more secure and removes the anxiety that can come from knowing that the magnet mounts might come loose after a Phob controller is dropped to the floor.
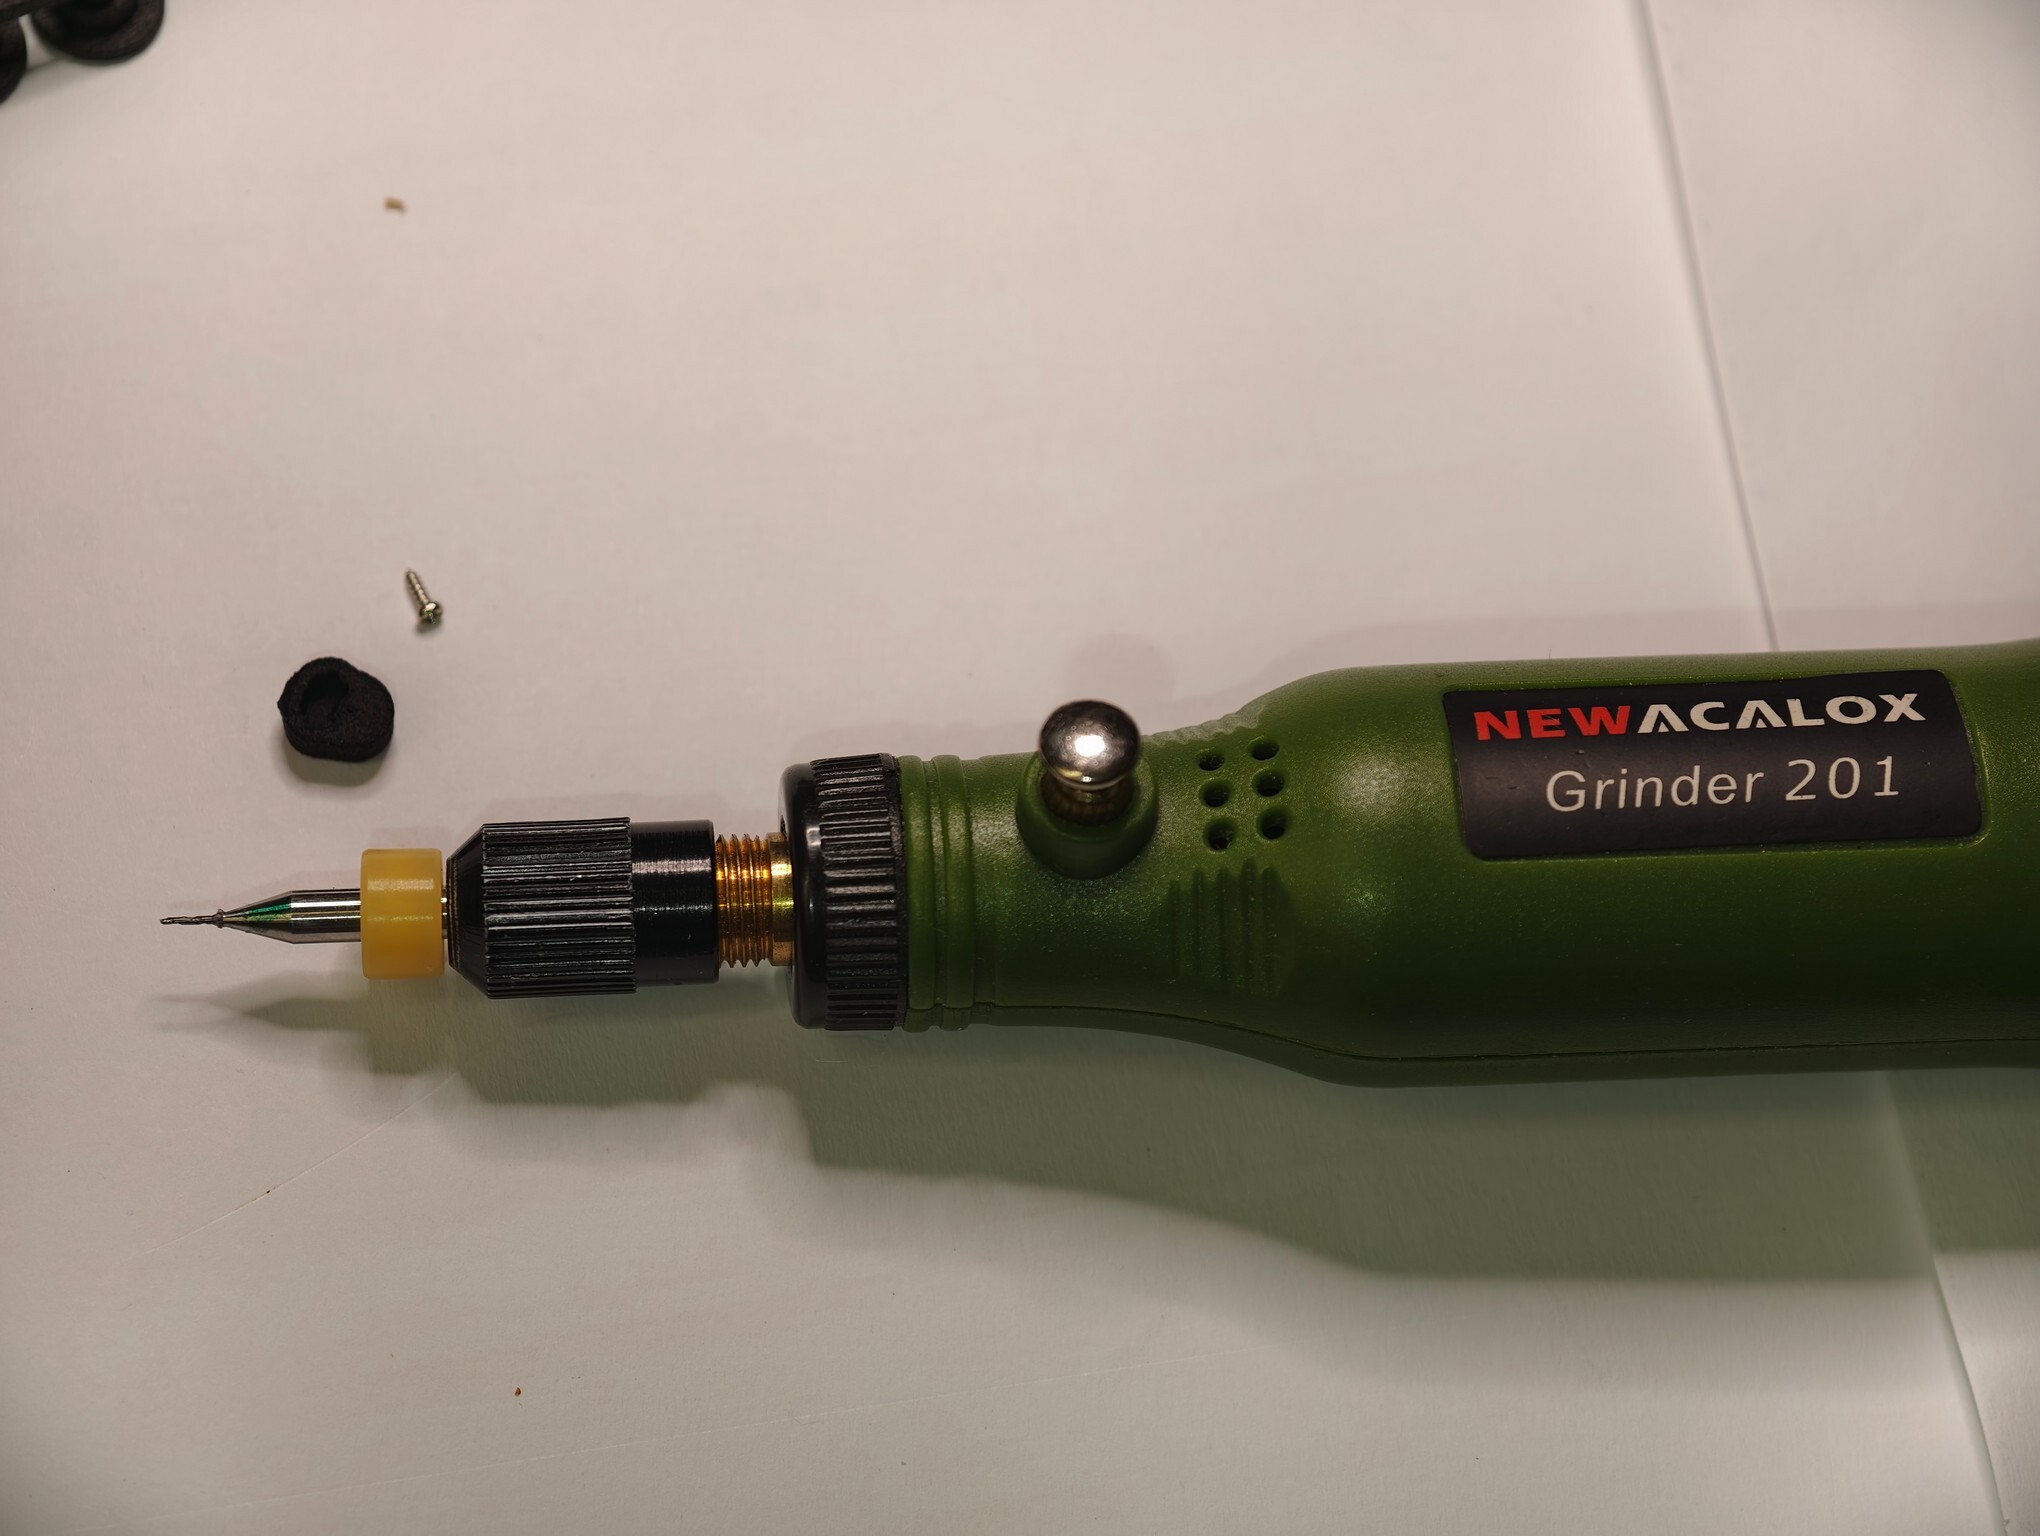
Installation steps for the drill version:
- Hold the magnet mount on a stickbox peg with one thumb. (This is easier to do when the stickbox is already installed to a Phob mainboard.)
- While holding the magnet mount, guide your grinder with a ~0.5 mm drill bit installed into the pre-drilled hole.
- While still holding the magnet mount with one hand, turn on the grinder and drill 4-5 mm of the drill bit into the stickbox peg.
- Carefully pull out the drill bit again. (If it gets caught, remove the magnet mount from the stick box temporarily and gently turn the drill bit part counter-clockwise by hand; being impatient here can quickly cause the thin drill bit to break. Make sure to put the magnet mount to the same stickbox peg right away afterwards – with the current drill type magnet mounts, the holes are drilled by hand, so their exact placement and angle varies a bit from mount to mount, so you should not mix them up after drilling holes into the stickbox pegs.)
- Put the 1 mm micro screw on the tip of your PH0 screwdriver and hold it there securely (especially if the magnet is already inserted into the mount). This is easiest to do by using your index fingernail to constantly push the screw towards the screwdriver, so that it won't get pulled away from the pre-drilled hole by the magnet.
- Carefully turn the screw clockwise until it's inserted all the way.
- Repeat for the remaining screws and magnet mounts. I advise doing the procedure one by one to avoid mixing up the mounts.
4 Reviews Hide Reviews Show Reviews
-
No magnets were delivered
Bought 3x 10 magnets with 10 mounts in bracket, didn’t get any magnets. The mounts are in good condition though. ** response by web shop owner: really sorry for the oversight from my part. I will send the missing magnets in a separate parcel as soon as possible.
-
Dh1h1 magnets & mounts
No problems so far, working perfectly in my own phob
-
Works
It works well with the 2 phob I made. No glue needed.
-
DH1H1 magnets for PhobGCC plus optional mounts
These magnets and mounts are the easiest and cheapest option for very high quality phob 2.0 magnets. The mounts fit perfectly, and they are very well made, you can easely remove the magnets if you need to and there is no friction between the stickbox and the mount that makes the stick very responsive and accurate. The magnets are more reliable and of much higher quality than the regular EU magnets. Very fast shipping to France.


